Clearance Checks After Changing Bearing Brand: Wholesale Supplier
Identical part numbers do not guarantee identical internal clearances.
When switching bearing brands, you must re-measure and adjust the internal clearance because manufacturing tolerances vary significantly between manufacturers. Failing to verify residual clearance after mounting leads to premature overheating, vibration spikes, and catastrophic seizure, regardless of the brand’s reputation.
I still remember the silence in the control room of a cement plant in Nigeria. It was not the good kind of silence. The crusher had just been restarted after a scheduled maintenance window where the original imported spherical roller bearings were replaced with a different reputable brand. The maintenance team used the exact same locknut torque values they had applied for years. Within two hours, the temperature sensors screamed. The bearing housing hit ninety degrees Celsius, and the unit locked up completely. The root cause was not a defective product, but a mismatch in initial clearance standards. The new brand’s C3 clearance, when subjected to the same interference fit as the previous brand, left zero operational play. That incident reshaped how I approach every bearing clearance check after brand change. It is not about trusting the box; it is about verifying the fit.
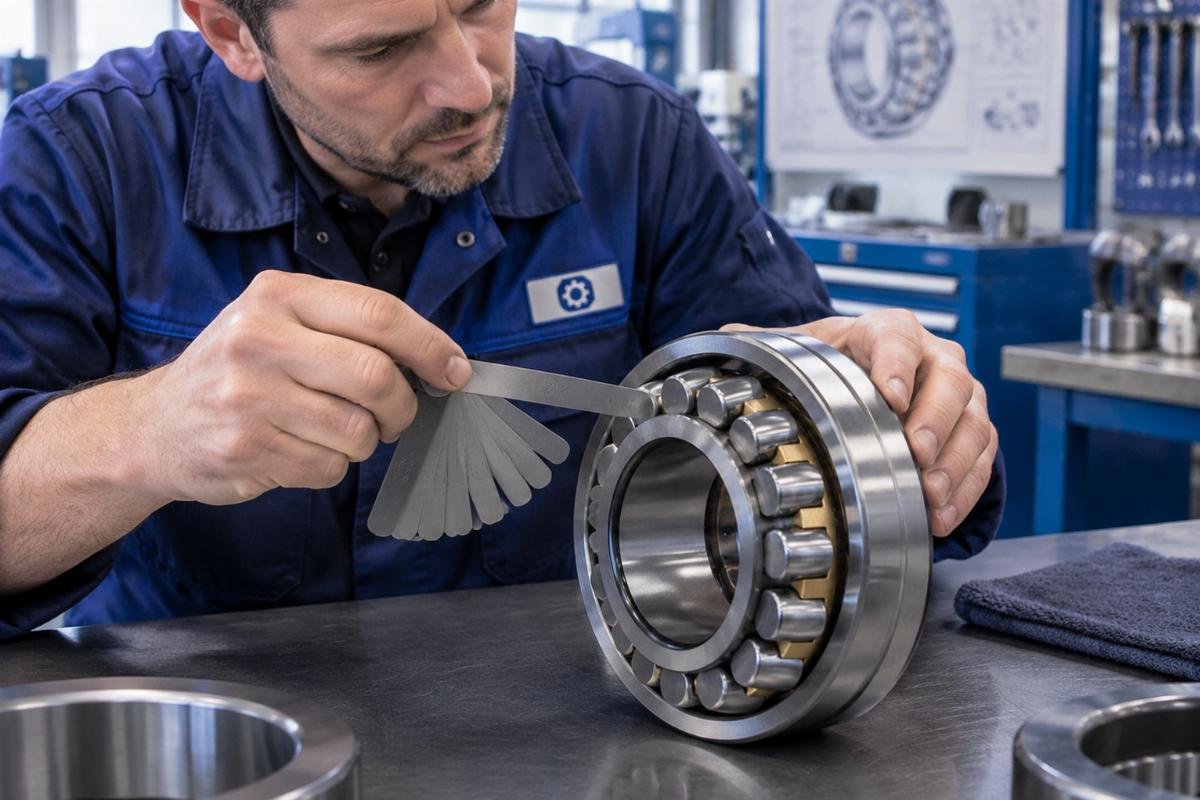
The assumption that a standard designation like 22210 CC/C3W33 means the same physical dimensions across all manufacturers is dangerous. While outer dimensions adhere to ISO standards, internal geometry, cage design, and tolerance stacks differ. This guide details the technical necessity of re-evaluating clearance, the correct measurement methodologies, and the adjustment procedures required to prevent downtime.
Why Do Clearances Change When Switching Brands?
Manufacturing tolerances are brand-specific, not universal.
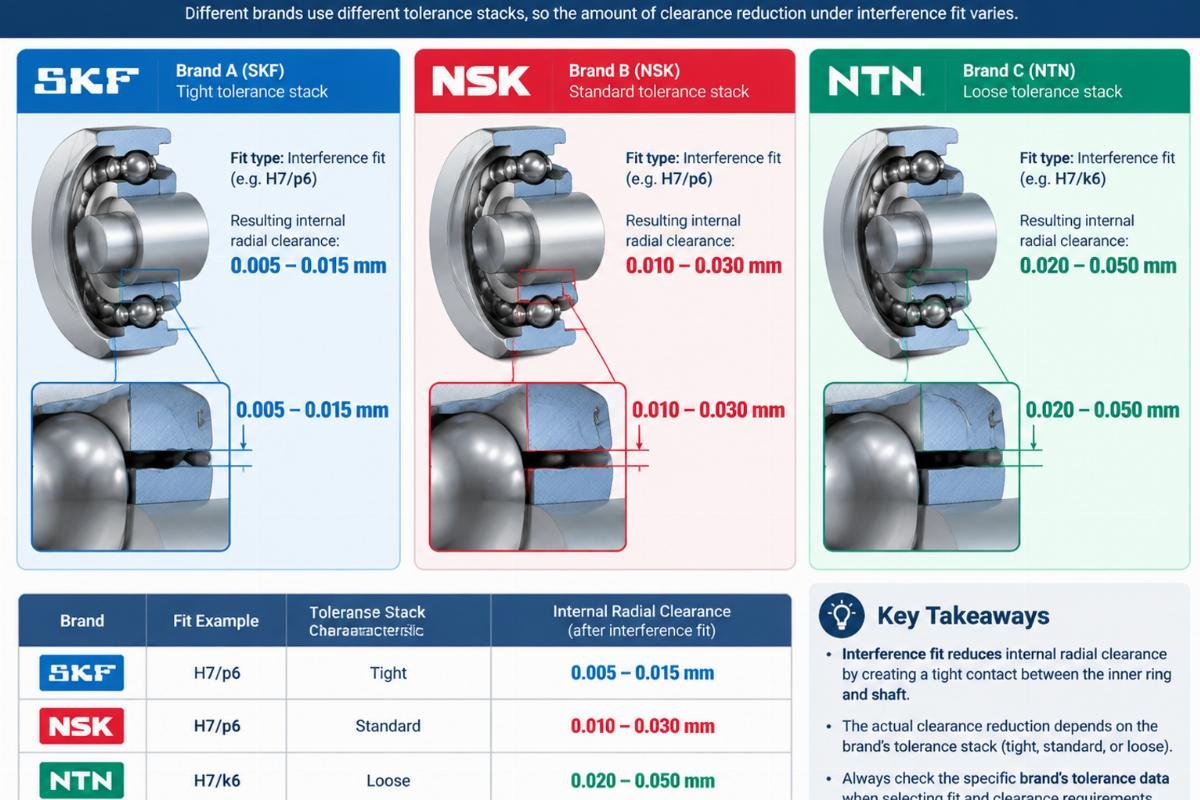
Even when two bearings share the same ISO boundary dimensions and clearance class, their actual measured clearances can differ due to variations in grinding processes, heat treatment, and cage manufacturing. [NEED_CITE: ISO 5753 radial internal clearance limits vs manufacturer specific production tolerances]. Most maintenance teams assume that if the part number matches, the installation procedure remains identical. This is a critical error.
Different manufacturers utilize distinct methods for achieving surface finish and roundness. One brand might hold a tighter tolerance on the bore diameter, while another focuses on outer ring consistency. When you press a bearing onto a shaft with an interference fit, the inner ring expands, reducing the internal radial clearance. If the new brand has a slightly smaller initial clearance or a different wall thickness distribution, the residual clearance after mounting may drop below the minimum required for thermal expansion.
Consider a mining conveyor operation where roller bearings were swapped during a major overhaul. The maintenance crew did not account for the subtle difference in the new brand’s tolerance stack. Post-installation, the radial clearance was too tight. Once the conveyor started carrying load, the friction generated heat faster than it could dissipate. Vibration levels increased by a significant margin, leading to early detection of distress. Had they performed a proper bearing clearance check after brand change, they would have identified the tight fit before bolting down the housing.
The key takeaway is that clearance classes (C2, CN, C3, C4) define a range, not a fixed value. A bearing at the lower limit of C3 from one supplier may behave like a CN from another when mounted. Therefore, relying solely on the catalog specification without physical verification is a gamble with equipment reliability.
How to Measure Initial and Residual Clearance Correctly?
Use feeler gauges for unmounted bearings and dial indicators for mounted assemblies.
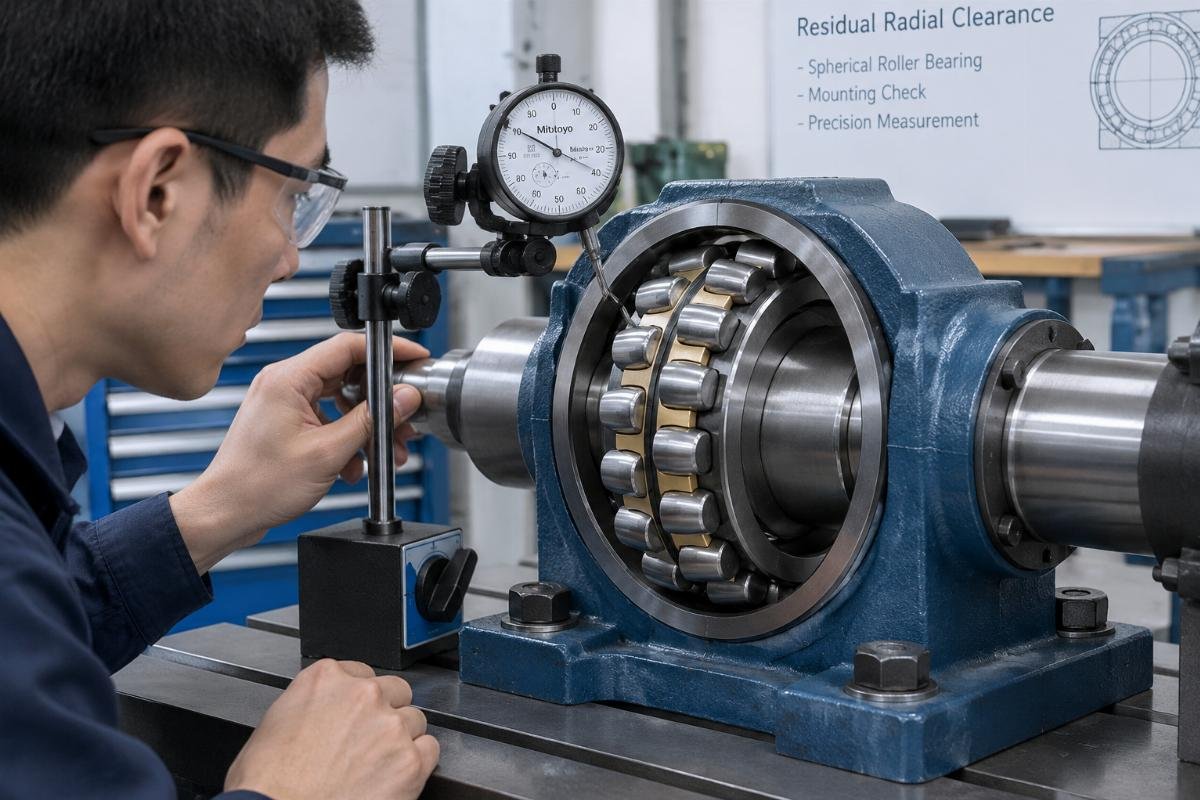
Accurate measurement requires understanding the state of the bearing. Initial clearance is measured before mounting, while residual clearance is measured after the bearing is fitted to the shaft and housing. [NEED_CITE: Standard methods for measuring radial internal clearance in rolling bearings].
For spherical roller bearings and cylindrical roller bearings, the feeler gauge method is common for initial checks. Insert the gauge between the roller and the raceway at the top of the bearing while holding the inner ring steady. Rotate the outer ring slightly to ensure the rollers are seated correctly. Record the maximum thickness that fits with slight drag. This gives you the baseline.
However, the critical value is the residual clearance. Once the bearing is mounted on the shaft with an interference fit, the inner ring expands, reducing this gap. To measure this accurately on large bearings, technicians often use a dial indicator. Mount the indicator on the housing and apply a gentle lifting force to the inner ring. The movement recorded is the residual radial clearance.
A steel mill experienced premature failure within a week of changing bearing suppliers for a high-speed fan application. The issue was incorrect axial clearance setting, which stemmed from a misinterpretation of radial measurements. The team assumed the radial clearance was sufficient, but they failed to account for the axial displacement caused by the tapered bore mounting. Performing a thorough bearing clearance check after brand change would have revealed that the new brand’s geometry required a different push-up distance on the tapered sleeve.
It is essential to document these measurements. Create a log that includes the brand, batch number, initial clearance, and residual clearance. This data becomes invaluable for future maintenance cycles and helps identify if a specific brand consistently runs at the upper or lower end of the tolerance range.
What Are the Step-by-Step Adjustment Procedures?
Follow specific locknut torque values and verify axial play post-assembly.
Adjusting clearance is not just about measurement; it is about precise mechanical adjustment. For bearings mounted on tapered sleeves or adapter sleeves, the position of the bearing on the taper determines the final clearance. [NEED_CITE: Manufacturer technical manuals for locknut torque and drive-up methods].
- Mount the bearing: Slide the bearing onto the tapered sleeve or shaft. Ensure the seating is clean and free of debris.
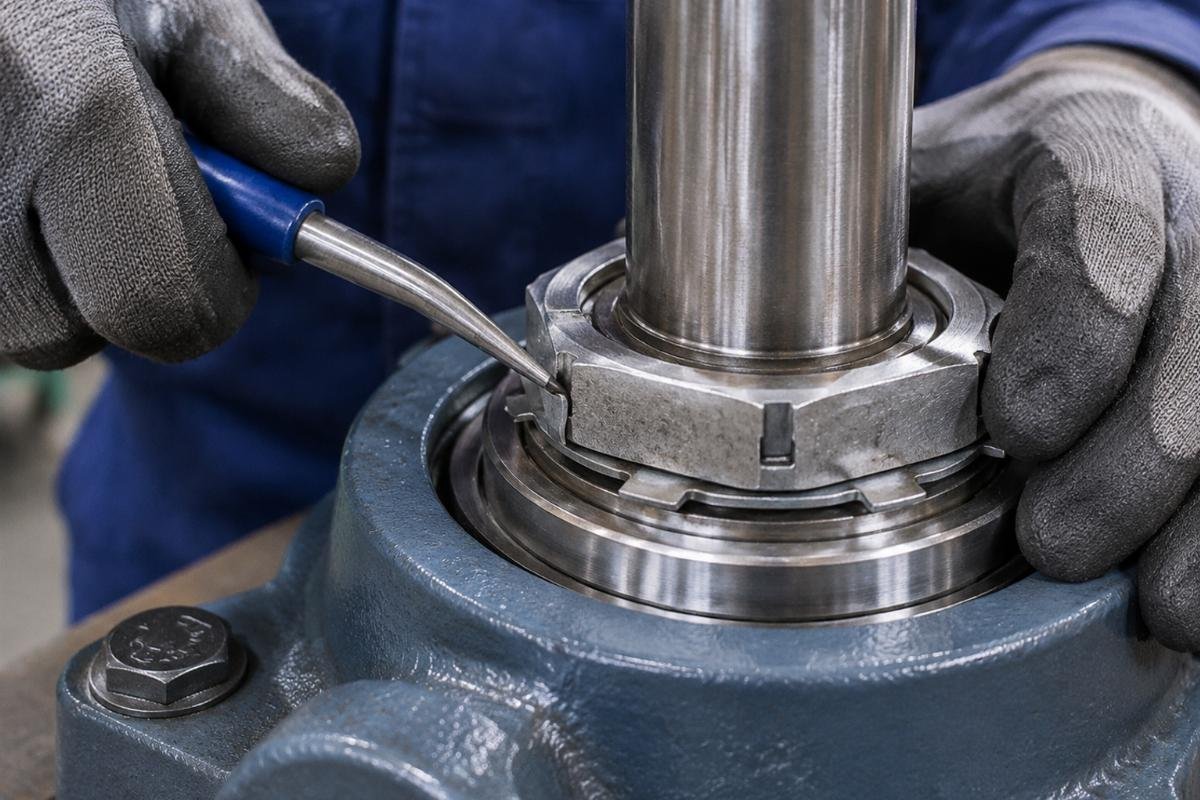
- Tighten the locknut: Use a hook spanner to tighten the locknut. Do not use impact wrenches, as they can damage the threads or cause uneven seating.
- Measure during tightening: For large bearings, monitor the reduction in clearance as you tighten. Stop when the desired residual clearance is reached.
- Secure the lock washer: Bend the tabs of the lock washer into the slots of the locknut. This prevents loosening due to vibration.
- Verify axial play: Check the axial displacement to ensure it aligns with the manufacturer’s recommendations for the specific clearance class.
A common mistake is reusing old torque habits. In one instance, a maintenance team in a power generation facility applied the same torque to a new brand’s locknut as they did to the previous one. The new brand’s thread pitch and friction coefficients were slightly different, resulting in over-tightening. The bearing seized shortly after startup. This highlights why a bearing clearance check after brand change must include a review of the assembly instructions provided by the new manufacturer.
If you are unsure about the correct drive-up distance, consult the technical datasheet. Reputable suppliers provide these documents, detailing the relationship between drive-up distance and clearance reduction for each size. Without this data, you are guessing. Guessing leads to failures.
How to Avoid Common Installation Mistakes?
Never reuse old torque habits; always re-verify post-assembly.
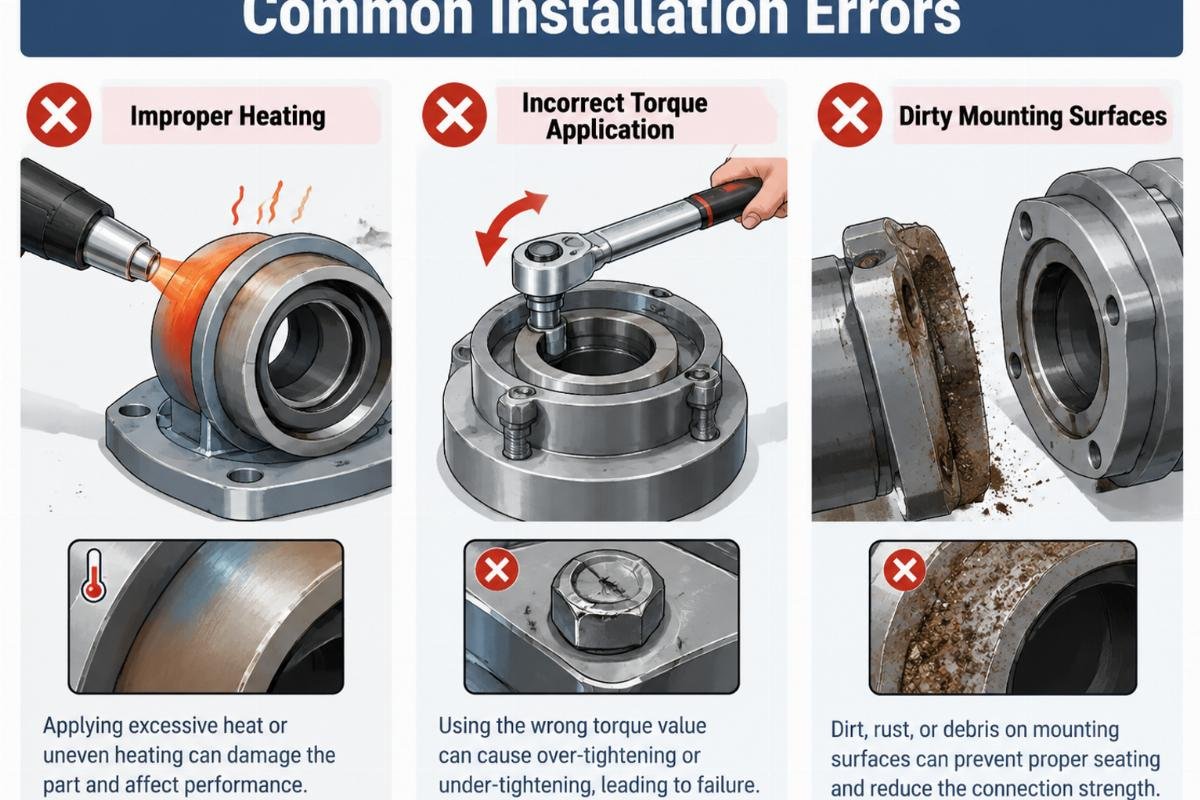
The most frequent errors occur when teams treat bearing replacement as a routine swap rather than a technical adjustment. Assuming that “tighter is better” is a dangerous myth. Excessive preload eliminates the necessary clearance for thermal expansion, leading to rapid temperature rise and lubricant breakdown.
Another common pitfall is ignoring the condition of the shaft and housing. If the shaft has wear or damage, the interference fit will be inconsistent. This variability affects the residual clearance unpredictably. Before installing a new brand, inspect the mating surfaces. If the shaft is out of tolerance, no amount of clearance adjustment will save the bearing.
Additionally, ensure you are using the correct tools. Improper heating methods for mounting can alter the bearing’s metallurgy or damage seals. Use induction heaters or oil baths controlled to recommended temperatures. Avoid open flames, which create hot spots and uneven expansion.
When sourcing replacements, ensure you receive complete technical datasheets. A reliable bearing clearance check after brand change depends on having access to the specific geometric data of the new product. Suppliers who provide genuine products with full traceability and technical support enable your team to make informed adjustments. This level of support is crucial when managing mixed-brand inventories or transitioning to cost-effective alternatives without compromising reliability.
Conclusion
Verification prevents failure.
Switching bearing brands requires a disciplined approach to clearance management. By recognizing that tolerance standards vary, measuring residual clearance accurately, and adjusting assembly procedures accordingly, you protect your equipment from avoidable downtime. Always prioritize technical verification over assumption. A rigorous bearing clearance check after brand change is the single most effective step to ensure long-term reliability and operational safety.

Written by
authorEditor covering global sourcing, supplier verification, and industrial product knowledge. Content is compiled from manufacturer specifications, industry standards, and hands-on experience with international B2B buyers. Every article is fact-checked before publishing to help procurement professionals make informed decisions.
View all posts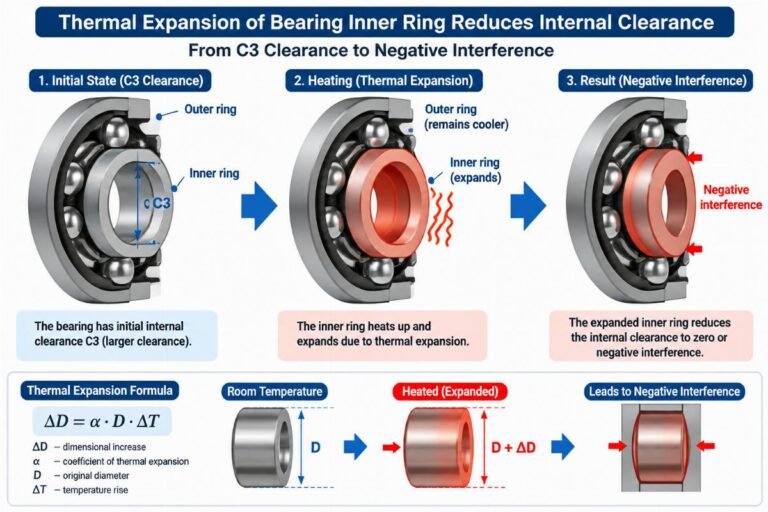
Leave a Reply