Bearing ID Service: Send Photos & Samples to Global Supplier
A clear photo is rarely enough for accurate bearing identification.
To ensure 100% accurate procurement, you must send high-resolution macro photos of the nameplate alongside a physically intact, cleaned sample with full operational context. Relying solely on visual appearance often leads to critical mismatches in internal clearance and suffix codes, which cannot be determined by eye.
I learned this lesson the hard way during my early days in equipment procurement in Qingdao. A client from the Middle East sent a pixelated image of a spherical roller bearing and a rusted, seized sample, demanding an urgent quote. I matched the outer dimensions and shipped a full container based on the standard model number. Upon arrival at Jebel Ali Port, the installation team found the bearings would not fit into the housing due to incorrect internal clearance. The cargo sat stranded for weeks, incurring demurrage charges that far exceeded the value of the goods themselves. That financial hit shifted my entire approach to bearing identification from photos and samples. Now, I never quote without verifying the suffix, clearance, and seal type through a strict verification process. This article details exactly how to prepare your submission to avoid such costly errors.
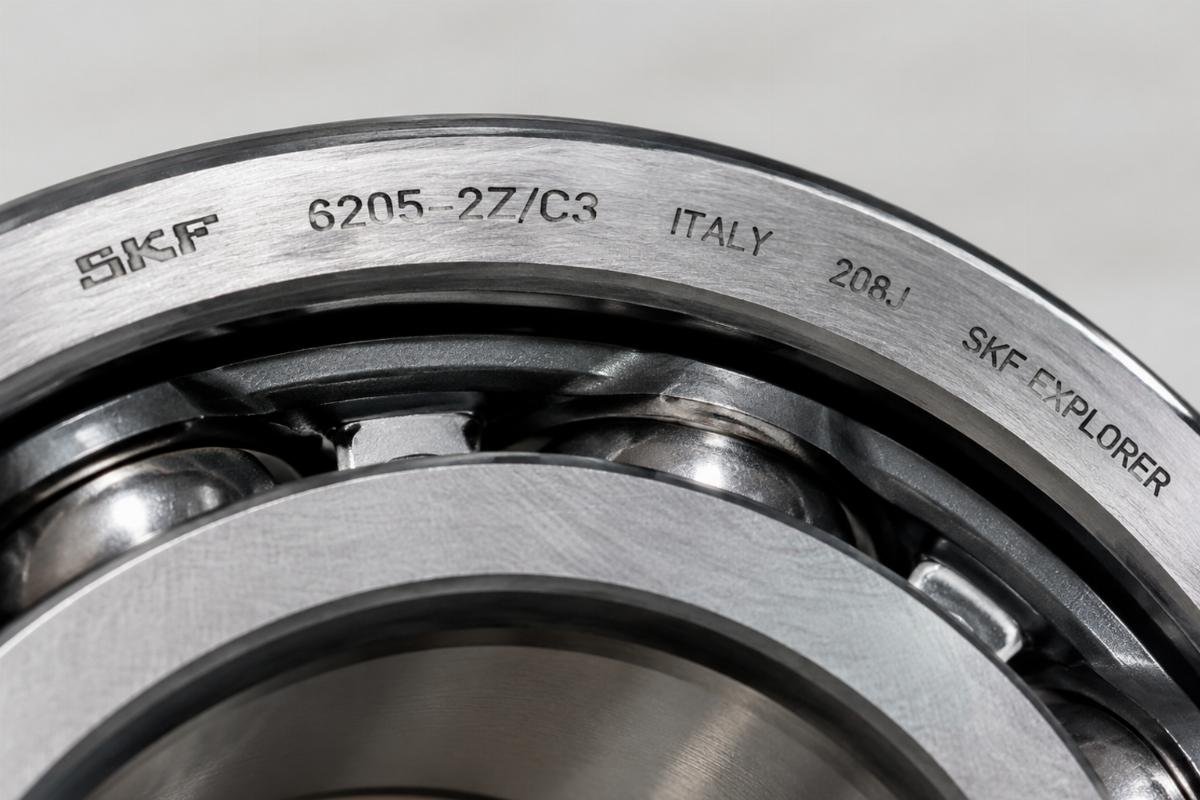
Moving forward, we will break down why visuals fail, what your photos must capture, how to package physical samples, and what contextual data is non-negotiable for precise matching.
Why Do Photos Alone Fail at Bearing Identification?
Visual inspection reveals outer dimensions but misses critical internal specifications.
Many buyers assume that a clear photograph of a bearing’s exterior is sufficient for identification. While a photo can confirm the bore diameter, outside diameter, and width, it cannot reveal the internal clearance, cage material, or heat treatment specifics. These hidden attributes are defined by suffixes on the nameplate, which are often too small to read in standard photographs.
According to international standards, internal clearance classes such as C2, C3, C4, and C5 dictate how a bearing fits under thermal expansion and load [NEED_CITE: ISO internal clearance standards for rolling bearings]. A C3 clearance bearing looks identical to a C0 (normal) clearance bearing from the outside. If you replace a C3 bearing with a C0 in a high-temperature application, the inner ring will expand, eliminate the clearance, and cause premature seizure.
I once handled a request from a European wind farm operator who sent only side-profile images of a cylindrical roller bearing. The outer dimensions matched a common standard part. However, the original bearing had a specialized phenolic resin cage designed for high-speed stability, while the quoted replacement used a standard steel cage. The mismatch led to excessive vibration within months. This scenario highlights why bearing identification from photos and samples requires more than just geometry. Without reading the suffix code directly from the nameplate, any quote is essentially a guess.
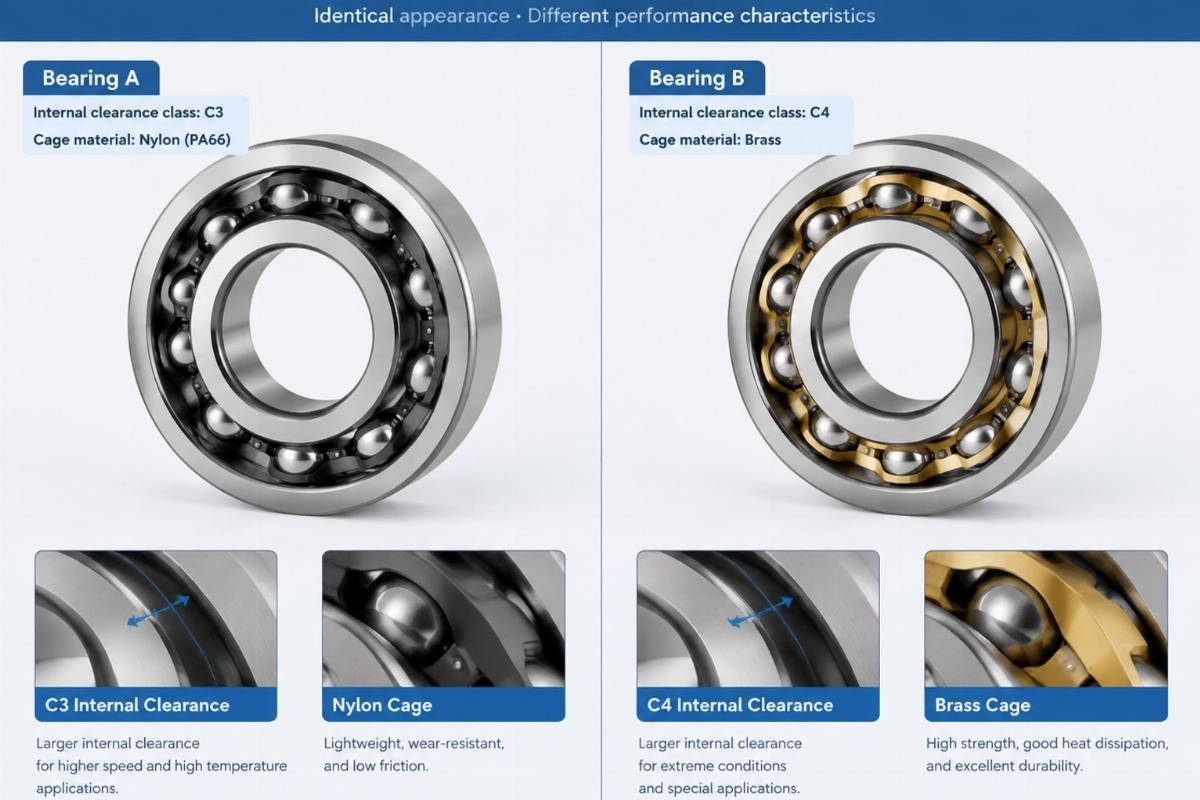
Therefore, photos serve as a preliminary filter, not a final verification tool. They help narrow down the series, but they cannot confirm the exact variant required for your application.
What Details Must a Bearing Photo Include?
High-resolution macro shots of the nameplate, seals, and overall condition are mandatory.
If you are submitting images for bearing identification from photos and samples, quality matters more than quantity. A single blurry image of the entire bearing is useless. You need specific angles that capture the data engraved or stamped on the component.
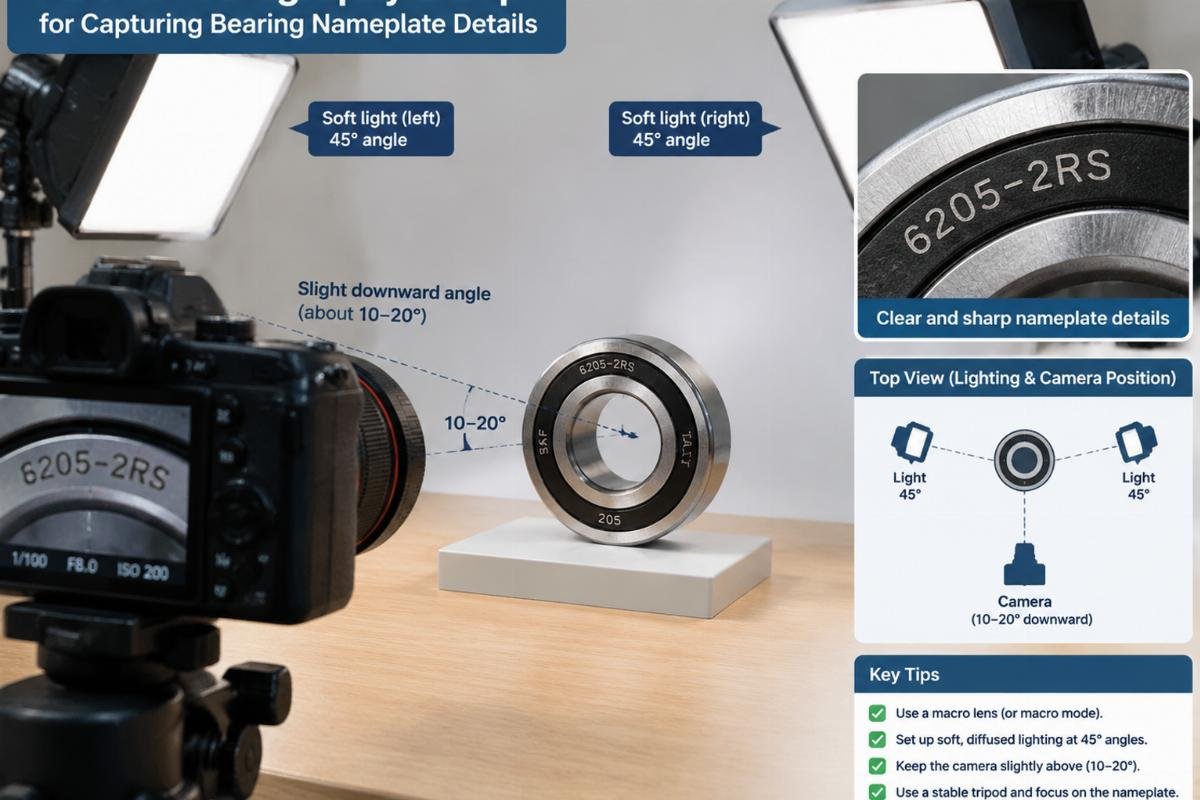
First, focus on the nameplate or laser marking. Use a macro lens or the close-up mode on your smartphone. Ensure the lighting is even to avoid glare on the metal surface. The photo must clearly show the brand logo, basic part number, and most importantly, the suffix codes. These suffixes indicate modifications such as sealing types, lubrication, and precision grades. If the marking is worn, take multiple shots from different angles to piece together the characters.
Second, photograph the seal or shield. The color and material of the seal provide clues about the operating environment. For instance, black rubber seals often indicate nitrile rubber suitable for general use, while blue or green seals might suggest fluorocarbon materials for higher temperature resistance. A photo of the seal profile helps distinguish between contact seals, non-contact shields, and labyrinth seals.
Third, document the current condition. Take wide-angle shots showing any rust, discoloration, or deformation. This helps the technical team assess whether the sample has been compromised by corrosion or overheating, which can alter dimensions.
| Photo Requirement | Purpose | Common Mistake |
|---|---|---|
| Nameplate Macro | Read suffixes and brand | Glare obscuring text |
| Seal Profile | Identify material and type | Assuming all seals are identical |
| Overall Condition | Assess damage and wear | Sending only clean, new-looking pics |
| Scale Reference | Confirm approximate size | No object for size comparison |
A US distributor once sent a batch of photos where the nameplates were unreadable due to heavy grease. We requested they clean a small area and retake the shot. The extra day spent waiting for clear images prevented a misidentification that would have resulted in shipping the wrong seal type. Clear visuals streamline the bearing identification from photos and samples process significantly.
How Should Physical Samples Be Packaged and Sent?
Samples must be cleaned, oiled, and cushioned to prevent transit damage that skews measurements.
When photos are inconclusive, sending a physical sample becomes necessary. However, the condition in which the sample arrives determines the accuracy of the analysis. A damaged sample leads to incorrect dimensional readings and faulty recommendations.
Start by cleaning the bearing thoroughly. Remove all old grease, dirt, and debris. Use a solvent that does not corrode the metal. Once clean, apply a thin layer of anti-rust oil. This prevents flash rust during shipping, especially if the transit involves humid environments or sea freight. Rust pits can change the measured diameter of the raceways, leading to false conclusions about wear or original tolerances.
Packaging is equally critical. Never wrap a bearing directly in bubble wrap or paper without protection. The rolling elements can shift and dent the raceways if subjected to impact. Place the bearing in a rigid plastic box or a sturdy cardboard container with sufficient cushioning material around it. Ensure it cannot move inside the box. If sending multiple samples, pack them individually to prevent them from knocking against each other.
I recall receiving a sample from a Latin American mining site that was wrapped only in newspaper. During transit, the bearing had rolled around inside the box, causing minor dents on the outer ring. Our technicians initially thought these were manufacturing defects or signs of severe overload. After consulting with the client, we realized it was shipping damage. This incident reinforced our protocol for bearing identification from photos and samples, requiring robust packaging guidelines for all clients.
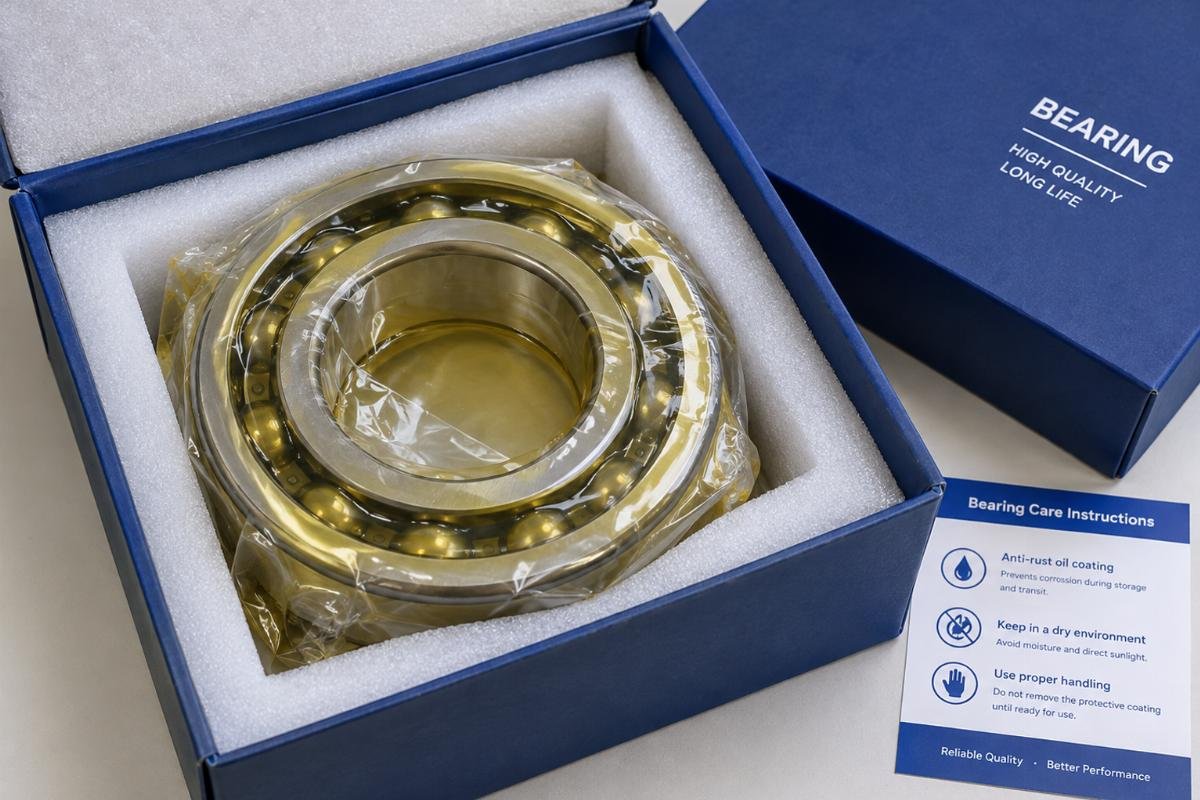
By protecting the sample’s integrity, you ensure that the measurements taken by our technical team reflect the true specifications of the original part, not the trauma of logistics.
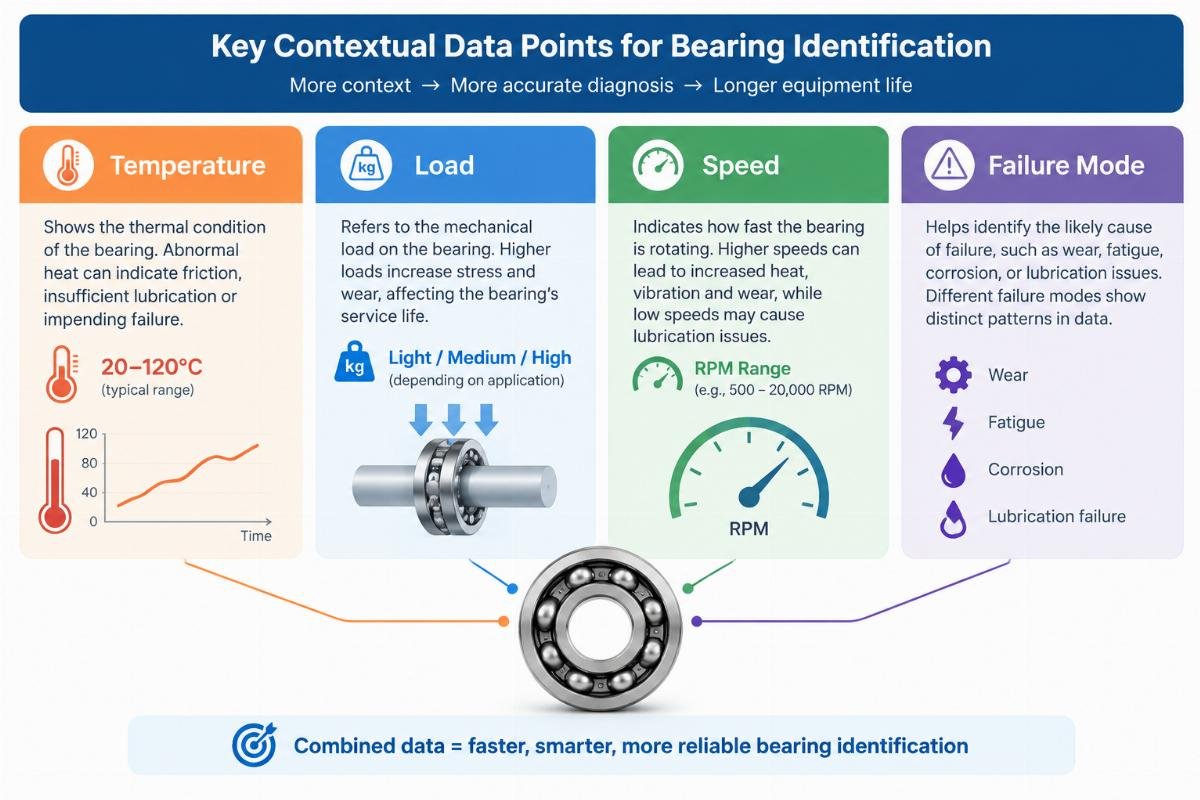
What Contextual Data Must Accompany the Sample?
Operating temperature, load, and failure mode dictate the exact clearance and suffix needed.
A bearing does not exist in a vacuum. Its performance depends on the application environment. Sending a sample without context is like prescribing medicine without knowing the patient’s symptoms. To achieve accurate bearing identification from photos and samples, you must provide operational data.
Include the following details with your submission:
- Operating Temperature: High temperatures require special heat treatment and larger internal clearances. If the bearing runs hot, a standard clearance will vanish, causing failure.
- Load Type and Magnitude: Heavy radial loads might necessitate a spherical roller bearing, while combined loads might require an angular contact design. Knowing the load helps verify if the original selection was correct or if an upgrade is needed.
- Speed (RPM): High speeds generate heat and require specific cage materials and lubrication.
- Failure Mode: Describe how the previous bearing failed. Did it seize? Did it make noise? Was there spalling on the raceways? Photos of the failure pattern help identify root causes such as misalignment, lubrication starvation, or electrical fluting.
A cement plant operator in Southeast Asia sent a worn-out deep groove ball bearing without any context. Based on the dimensions, we quoted a standard industrial grade. However, the client later revealed the bearing was used in a kiln fan operating at elevated temperatures. The standard bearing failed quickly. Had we known the temperature, we would have recommended a bearing with C3 clearance and high-temperature stabilization. This oversight cost the client unplanned downtime.
Providing this context allows our technical team to cross-reference the physical sample with industry best practices. It transforms a simple part replacement into an engineered solution.
Conclusion
Accurate identification requires a holistic approach combining visual, physical, and contextual data.
Sending clear photos and intact samples with detailed operational history is the only way to prevent costly mismatches in bearing procurement. By focusing on suffixes, internal clearances, and application conditions, you ensure that the replacement part performs as expected. This rigorous approach to bearing identification from photos and samples saves time, money, and trust in the long run.

Written by
authorEditor covering global sourcing, supplier verification, and industrial product knowledge. Content is compiled from manufacturer specifications, industry standards, and hands-on experience with international B2B buyers. Every article is fact-checked before publishing to help procurement professionals make informed decisions.
View all posts

Leave a Reply